
Before / After
- Format
- Static, Video
- Category
- Social Proof
- Stage
- TOF, MOF, BOF
- Requires
- Real proof
What is it
Two states of the same subject side by side: a painful before and a desirable after, with the product, timeframe or stat sitting between them as the explanation. It works on contrast, which people read faster than words — the comparison registers before anyone decides whether to pay attention.
What makes it work
Build the after first
The eye lands on the resolved state, so nail the most desirable believable version of it, then build the before to contrast it. Doing it the other way round gives you a good problem and a weak payoff.
The before has to look like your customer this morning
Relatable, not exaggerated. The whole mechanism is the viewer casting themselves as the before, and a caricature nobody recognises breaks it instantly.
Put the catalyst on the bridge
Product, day count or stat between the two panels or on the dividing line. That's where the eye goes hunting for the how, and a transformation with no visible cause reads as a claim rather than proof.
Match the framing exactly
Same angle, same distance, same lighting, same expression. Any visible change in how it was shot lets the viewer explain the result away.
Label with time or identity, never with shame
"Day 30," "Old You / New You," "97% saw." Nothing that names the viewer's flaw.
Pick the vehicle by your risk profile
It doesn't have to be a person. A dirty hairbrush, a 3D character, a toggle switch, a column of numbers — all carry the same contrast, and the non-human versions dodge both policy problems and ad fatigue.
Reference 1
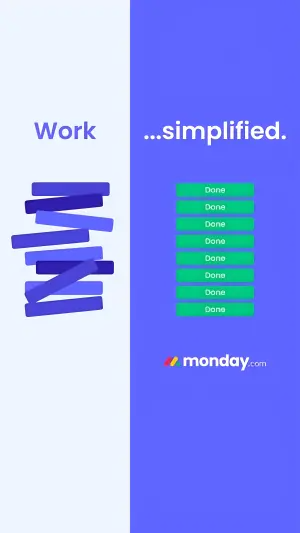
AI Edit Master Prompt
Using the attached image as the layout reference: keep the hard vertical split with a pale left half and a saturated brand-colour right half, one word of the headline on each side at the same height, a chaotic scattered shape cluster on the left, a neat vertical stack of identical labelled buttons on the right, and the wordmark centred at the bottom of the right half. Replace the colours with {YOUR BRAND COLOR}. Set the headline to "{THE PROBLEM}" / "{THE FIX}", the button labels to "{STATUS WORD}", and the wordmark to "{YOUR BRAND}".Reference 2

AI Edit Master Prompt
Using the attached image as the layout reference: keep the side-by-side selfie pair, the rounded label pills with glow outlines above each photo, and the bottom bar with the wordmark left and the dark offer pill right. Replace the photos with {YOUR BEFORE PHOTO} and {YOUR AFTER PHOTO}, both unretouched phone selfies in the same framing. Set the labels to "{BEFORE LABEL}" and "{AFTER LABEL}", the wordmark to "{YOUR BRAND}", and the offer pill to "{YOUR OFFER}". Keep the small legal line in the lower left of the first photo.Reference 3
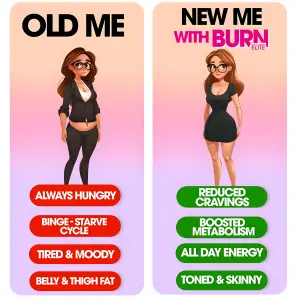
AI Edit Master Prompt
Using the attached image as the layout reference: keep the two vertical panels on a gradient background, each topped with a bold outlined headline, a full-body cartoon figure below it, and a stack of rounded label pills beneath. Replace the figures with {YOUR CHARACTER} illustrated in the same style, slumped on the left and confident on the right. Set the headlines to "{BEFORE LABEL}" and "{AFTER LABEL} with {YOUR BRAND}". Fill the left pills in red with "{PROBLEMS}" and the right pills in green with "{RESULTS}".Reference 4
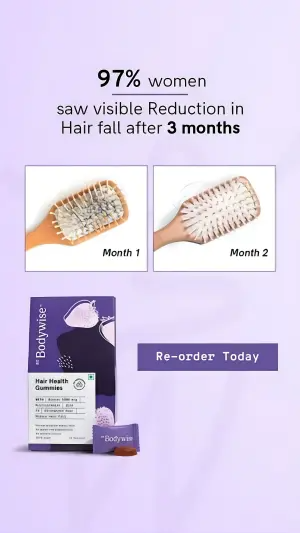
AI Edit Master Prompt
Using the attached image as the layout reference: keep the centred stat headline with the number oversized, the two framed photos side by side with handwritten-style time captions beneath, the product pack lower left and the outlined button lower right, all on a flat pastel background. Replace the photos with {YOUR BEFORE PHOTO} and {YOUR AFTER PHOTO} shot identically. Set the headline to "{STAT}% {WHO} saw {RESULT} after {TIMEFRAME}", the captions to "{TIME 1}" and "{TIME 2}", the product to {YOUR PRODUCT}, and the button to "{CTA}".Reference 5
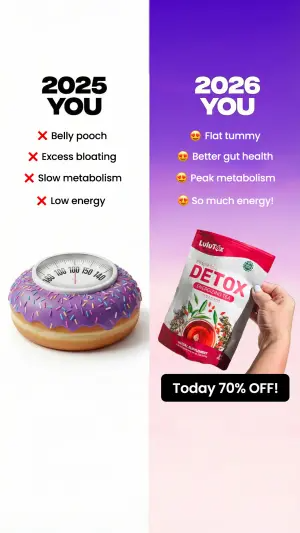
AI Edit Master Prompt
Using the attached image as the layout reference: keep the hard vertical split with a pale left half and a saturated gradient right half, the stacked year headlines at the top, the red-cross list on the left and the emoji-bullet list on the right, a symbolic object bottom left and the product held in a hand bottom right, plus a black offer pill at the base. Replace the left object with {PROBLEM SYMBOL} and the right with {YOUR PRODUCT}. Set the headlines to "{YEAR 1} YOU" and "{YEAR 2} YOU", the lists to "{PROBLEMS}" and "{RESULTS}", and the pill to "{YOUR OFFER}".Reference 6
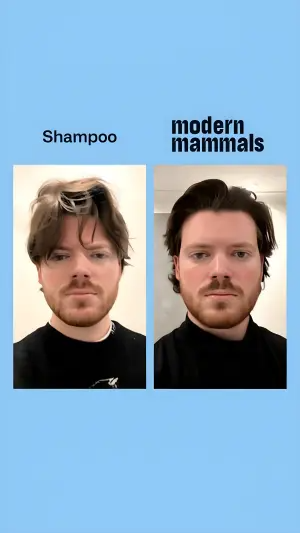
AI Edit Master Prompt
Using the attached image as the layout reference: keep the flat pale-blue background, two portrait photos side by side at equal size, a plain label above the left and the brand wordmark above the right. Replace the photos with {YOUR BEFORE PHOTO} and {YOUR AFTER PHOTO}, same person, same pose, same framing, phone quality. Set the left label to "{THE OLD WAY}" and the right to "{YOUR BRAND}".Reference 7

AI Edit Master Prompt
Using the attached image as the layout reference: keep the two dark photo panels split down the middle, a serif headline centred across each, overlapping chat-bubble screenshots stacked up the left panel and only two near the top of the right, and the wordmark centred at the bottom. Replace the photos with {YOUR BEFORE SCENE} and {YOUR AFTER SCENE}. Set the headlines to "{THE OLD WAY} without {YOUR BRAND}" and "{THE NEW WAY} with {YOUR BRAND}". Fill the left bubbles with "{THE SPIRAL}" timestamped through the night and the right with "{THE CALM VERSION}".Reference 8
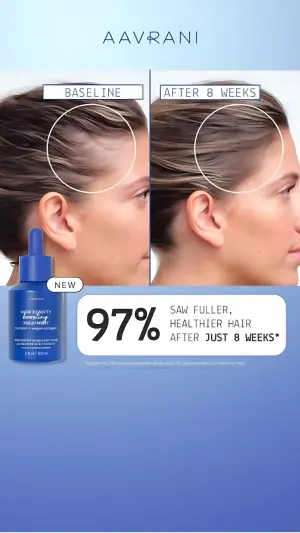
AI Edit Master Prompt
Using the attached image as the layout reference: keep the pale blue gradient background, wordmark centred at top, two cropped profile photos side by side with outlined label boxes above them and a thin circle drawn on the area of change, the product bottle overlapping lower left, and a rounded stat panel across the bottom with an oversized number. Replace the photos with {YOUR BEFORE PHOTO} and {YOUR AFTER PHOTO} in matching profile framing. Set the labels to "{BEFORE LABEL}" and "{AFTER LABEL}", the brand to "{YOUR BRAND}", the product to {YOUR PRODUCT} tagged "NEW", and the stat to "{STAT}% {RESULT} after {TIMEFRAME}".Reference 10
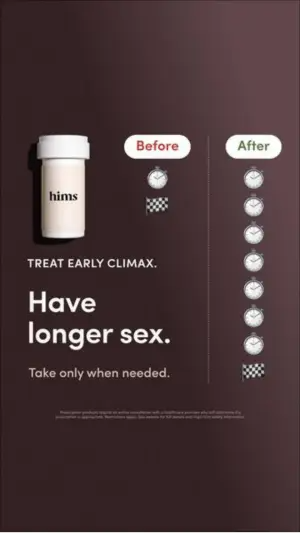
AI Edit Master Prompt
Using the attached image as the layout reference: keep the deep flat background, the product upper left, two outlined label pills side by side beneath it, and two vertical columns of repeating small icons below them — one short column on the left, one long column on the right, each ending with a different marker icon. Replace the icons with {YOUR UNIT ICON}. Set the labels to "Before" and "After", the product to {YOUR PRODUCT}, the small caps line to "{THE PROBLEM}", the large serif headline to "{THE PROMISE}", the line beneath to "{HOW TO USE}", and keep a small legal block at the bottom.Reference 11
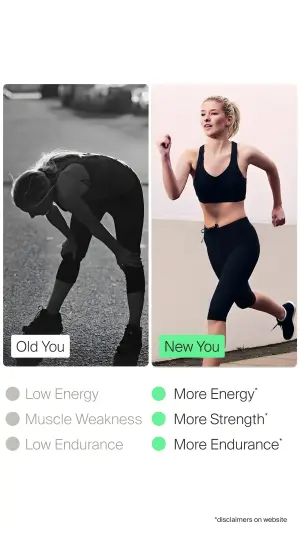
AI Edit Master Prompt
Using the attached image as the layout reference: keep the two photo panels side by side, the left desaturated to black and white and the right in full colour, a small label tab in the lower corner of each, and two aligned bullet lists beneath — grey dots on the left, green dots on the right. Replace the photos with {YOUR BEFORE PHOTO} and {YOUR AFTER PHOTO} of the same subject in the same setting. Set the labels to "{BEFORE LABEL}" and "{AFTER LABEL}", the lists to "{PROBLEMS}" and "{RESULTS}", and add a small disclaimer line at the bottom right.Reference 12
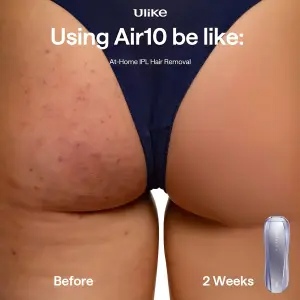
AI Edit Master Prompt
Using the attached image as the layout reference: keep the single photo split down the middle into a before and after half with a soft vertical seam, white headline text across the top with a smaller subline beneath, small white labels in the lower corners of each half, and the product inset bottom right. Replace the photo with {YOUR BEFORE PHOTO} and {YOUR AFTER PHOTO} of the same area, identical lighting and angle. Set the headline to "Using {YOUR PRODUCT} be like:", the subline to "{WHAT IT IS}", and the labels to "{BEFORE LABEL}" and "{AFTER LABEL}".Reference 13
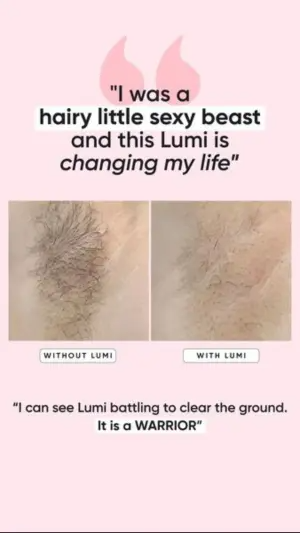
AI Edit Master Prompt
Using the attached image as the layout reference: keep the pale background, an oversized quote mark at the top, a centred quote with key phrases highlighted in a solid block, two photos side by side below it with small outlined caption tabs beneath each, and a second shorter quote at the bottom with one line bolded. Replace the photos with {YOUR BEFORE PHOTO} and {YOUR AFTER PHOTO} in matching macro framing. Set the top quote to "{CUSTOMER QUOTE}", the captions to "WITHOUT {YOUR BRAND}" and "WITH {YOUR BRAND}", and the bottom quote to "{SECOND QUOTE}".Reference 14
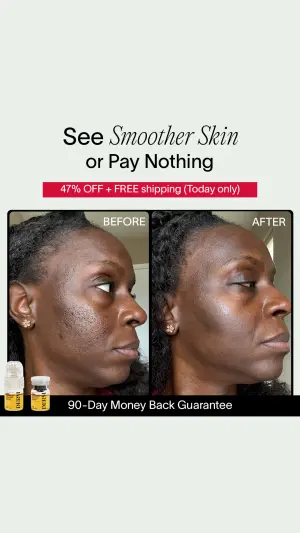
AI Edit Master Prompt
Using the attached image as the layout reference: keep the off-white background, a centred serif headline with one phrase italicised, a narrow red offer strip beneath it, two photos side by side with white corner labels, product bottles overlapping the lower left of the photo pair, and a black guarantee bar across the bottom. Replace the photos with {YOUR BEFORE PHOTO} and {YOUR AFTER PHOTO} in matching profile framing. Set the headline to "{THE PROMISE}", the strip to "{YOUR OFFER}", the labels to "BEFORE" and "AFTER", the product to {YOUR PRODUCT}, and the bar to "{YOUR GUARANTEE}".Reference 15
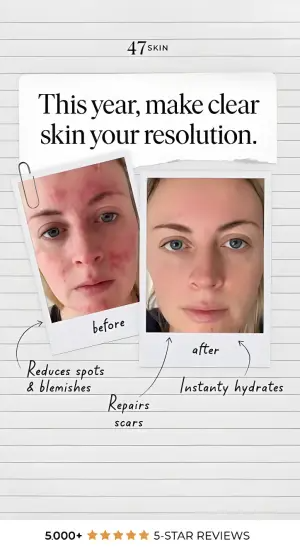
AI Edit Master Prompt
Using the attached image as the layout reference: keep the lined-notebook background, wordmark centred at top, a torn-paper headline block, two photos below it styled as taped and paperclipped polaroids at slight angles with handwritten captions, handwritten benefit notes with curved arrows pointing at each photo, and a review line at the bottom. Replace the photos with {YOUR BEFORE PHOTO} and {YOUR AFTER PHOTO}. Set the headline to "{THE PROMISE}", the captions to "before" and "after", the arrow notes to "{BENEFITS}", the brand to "{YOUR BRAND}", and the bottom line to "{REVIEW COUNT} 5-star reviews".